Shelters: your protection from cold, wet, wind, storms, possible exposure, radiation, or other hazards. Natural shelters include caves, rock overhangs, hollow trees, fallen trees, thick overhanging branches, and so on. Improvised shelters can be made from snow or ice blocks, a snow burrow or tunnel, a trench covered with logs or a groundsheet, a lean to of branches and leaves, tall grass tied together at the top to form a tee-pee shape, an A-frame tent made from a poncho or plastic sheet, and many other possibilities. Ideally, you should have adequate space for a bed, fireplace, dry woodpile, food, and gear. All shelters should have good ventilation to prevent carbon monoxide buildup and poisoning. Select the shelter site very carefully. Consider the distance from water, food sources, and wood. Avoid gullies, peaks, ridges, flood plains, poisonous plants, rough ground, insect and animal hazards, areas with brush or grass fire hazards, and slope subject to avalanche or rock falls. Stay out of the wind if possible. Beware of high tides and ice forced inland by high tides. Do not sleep on the ground in tropical areas. Improvise a hammock with a groundsheet or poncho held up by a rope tied between two trees. A sweat lodge can be made for a more permanent shelter. Build a cone-shaped solid pole frame over a dugout area large enough to sleep one or two men. Thatch the frame with grass, bark, leaves, or whatever. Cover with a layer of mud. Mix in 10 percent lime, cow manure, or straw, to increase the strength of the mud. Leave an opening just large enough for a man to enter. During cold weather, build a fire just outside the door. Work out a system whereby cold rocks are placed in the fire to collect heat while heated rocks are placed inside to release their heat in a steampit. And the rocks are then rotated as needed. See the Exposure section for other methods to warm your bed.
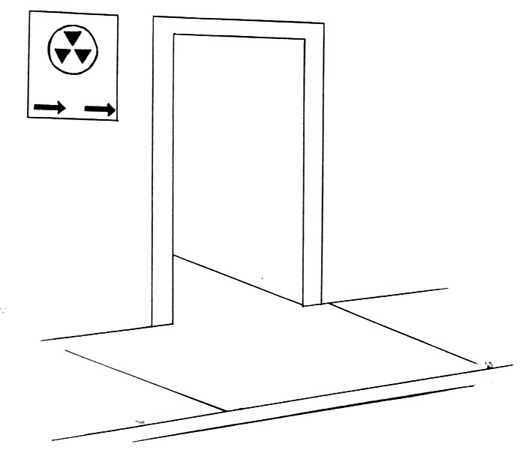
When you need protection from radiation, consider the improvised shelters discussed under the Flash-Heat section. If possible, construct a box-type fallout shelter under your garage, carport, porch, or study. A corner of your basement is also a good location. Ideally, it should be constructed with 8 inches of reinforced concrete or the shielding equivalent. See the Radiation section for details. The shelter door must open inward and should be made from 114 inch steel. An open door may be used if you make plans to have sand and sandbags ready for emergency closing, keep tools inside so you can cut and dig your way out if your home is collapsed into your basement. The alternative is to have a tunnel leading to a second exit outside. Use a hand-operated blower to provide fresh air inside the fallout shelter. Several temporary and permenant shelter designs follow to include one recommended by Civil Defense. Specific suggestions on air ventilation are included after the latter.
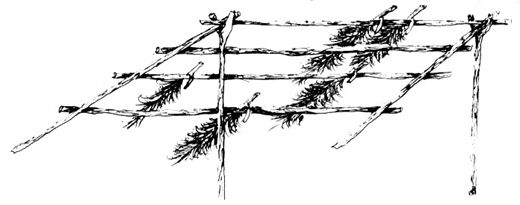
LEAN-TO
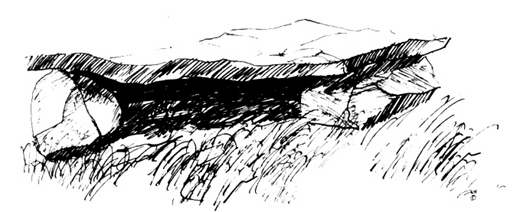
NATURAL CAVE
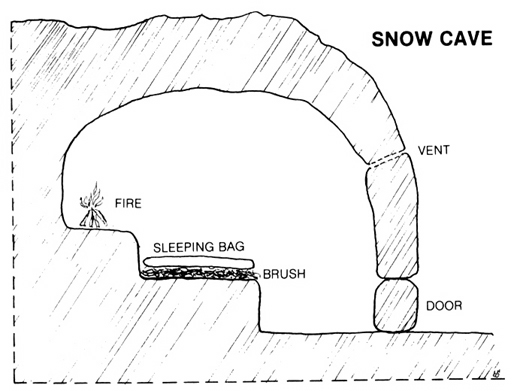
SNOW CAVE
ICE BLOCK TENT
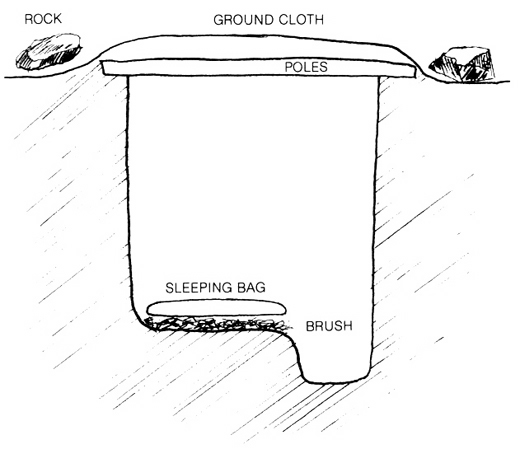
TRENCH

SWEAT LODGE
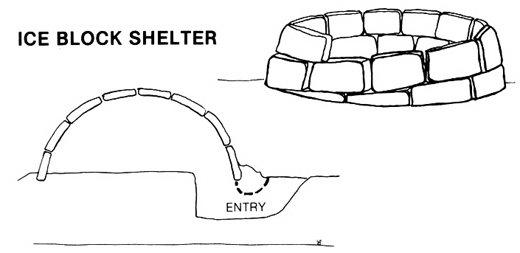
ICE BLOCK SHELTER
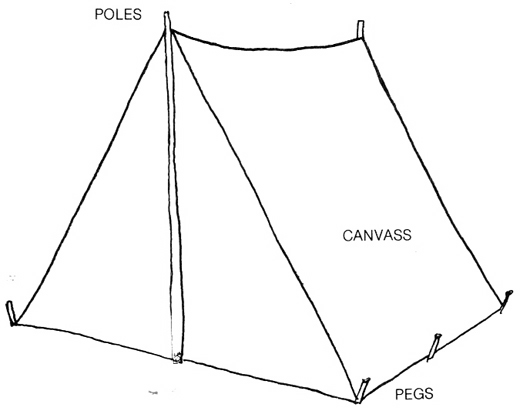
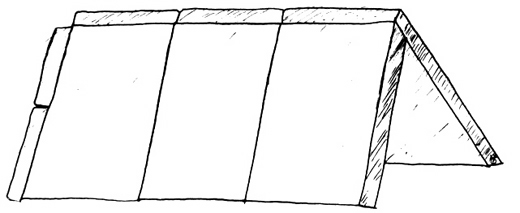
TENT
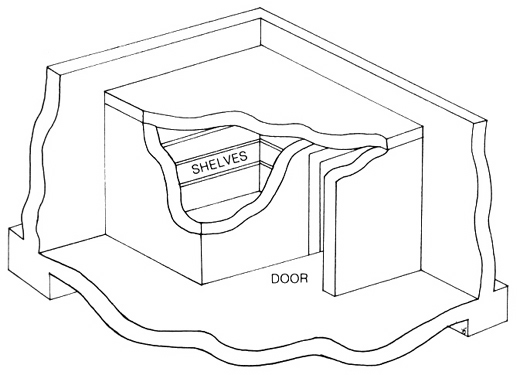
CIVIL DEFENSE SHELTER
BASEMENT FALLOUT SHELTER
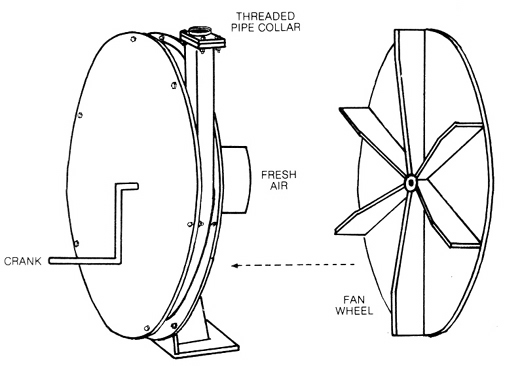
HAND-CRANK BLOWER
Note: To survive 2 or 3 weeks in a Fallout Shelter, you will need a Hand Crank Blower to bring in fresh air via an intake pioe. Commercial manufacture of this item has apparently been discontinued. These blowers can be improvised or custom made in a sheet metal shop. Another option would be to modify a small pressure blower by removing the motor and adding a hand-crank.
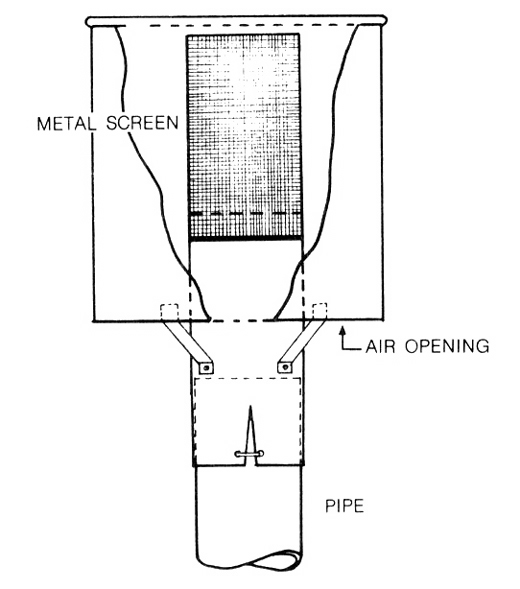
AIR HOOD
Note: The above Air Hood will keep radioactive particles out of your shelter air. Civil Defense officials recommend it only for the outer end of the intake pipe. To be safe also put one on the outer end of your shelter exhaust pipe.
